

Why Plaid???? I know I'm not much for Plaid anymore either. It really turned out beautiful. My inspiration for this tutorial was from a Polyform Products Challenge In July 2012. July Make-it-Your Own ~ Mad for Plaid Contest. So from that came this Plaid Cane Tutorial. What started out as a monthly challenge Idea turned into a tutorial. Sometimes a challenge makes you think and create outside the box and I love that part of a challenge. Creating and making an idea your own is fun and an amazing way to learn and improve your skills or maybe make you realize you are not crazy about making something. Lol. Weather you like to do it or not, you challenge yourself and when your finished its very rewarding win or loose. You tired and you finished. Lesson learned.


I Searched High and low for a tutorial I liked. Nothing struck me as pretty. I knew I wanted to create something with flowers. Yes I know I'm weird. Who thinks of flowers and plaid at the same time. Me :0) ! So through lots of hours of trial and error I made my own. There are a few steps that I would do over. I will tell you the Tips of what I would do over when I get to them. But I put alot of work into this one and if you follow my steps yours will turn out 100% more beautiful than mine. Lots of steps but do not be discouraged. It is alot of photos because I didn't want to leave anything out. One thing about alot of tutorials I buy I find there are so many steps missing. Im not sure why. I know as an artist that you know when you leave things out and when you don't. So the only thing I can think of is that they do not want work copied. I myself like to take a tutorial I buy and put my own twist on it. Sadly not everyone does that. Feel free to put your own twist on this. But don't twist while your Reducing the cane or you will have a Big Ol twisted mess. ;) . Have fun. Enjoy and as always read the whole tutorial before starting.

Supplies List: (Ignore the barrette base ~ When I started I was going to add a barrette to this but the tutorial was long enough)
Supplies:
Premo Clay # Light Pearl Green
Premo Clay # Magenta Pearl
Premo Clay # White Glitter Premo Accent
Acrylic Roller or Brayer Roller
Blade
Square Acrylic Rod
Clay Pasta Machine
Rubber Gloves and A Clean Work Area
Windex Wipes


Before you do anything please clean your work area. When making a cane you need a larger work area for rolling out clay and for reducing. So Wipe everything down well with your cleaner of choice. Mine is windex wipes. For some reason that cleans up the ceramic tiles I use perfectly for every use. If you have baked on clay from prior projects please scrape it clean with an old blade then wash again with your wipes. This way you are all set and you don't have to worry about picking up odd colors especially when your working with a pastel colored project and whites.
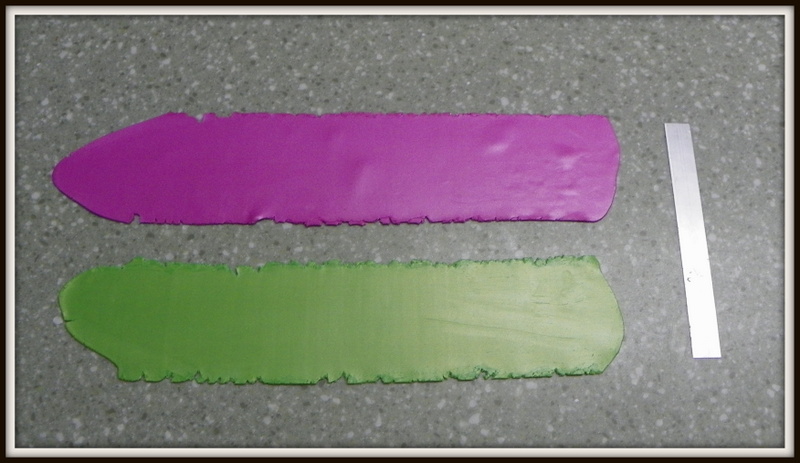
Step 1: condition your clay. You will need the full package of the green and magenta pearl. Only 1/4 of the white glitter. I conditioned all clay and rolled it out to the thickest setting and set it aside in 8 x 4 inch pieces. They do not have to be perfect. Were going to be making them thinner and cutting pieces. Just having your clay in flat pieces instead of conditioned balls is much easier to work with. Best way to store your conditioned clay anyways, less air bubbles.
Step 2: Make two long large sections of Magenta and Green, I used the #2 thickness on my pasta machine. Make them approximately 2-4 inches wide. Depending on how large of a cane you want. Mine were 2 1/2 inches wide. .
Step 3: Cut each color into 4 slices approximately same size pieces. At this point perfection on size is not super important but you want them close in size for stacking in the next step.


Step 4: Once you have all them sliced, Fold them in half as shown in the photo so that you have a thicker piece. They will be approx 2 x 1 1/2 inch rectangles. Do this to all 8 pieces.


Step 5 : Once you have 8 rectangles. Take your Acrylic roller and lightly roll each one to get the air bubbles out. You do not want to roll hard to flatten and make these alot larger in size, your just trying to get the clay you folded to connect well so there are no holes in your cane later.


Step 6 : Once they are all rolled out nicely. I cut the excess jagged edges off, Still keep in mind you want them all the same size. So you may want to use a small ruler to measure to keep them close in size at this point. I eye balled it.


Now you have 8 pieces that I hope are close to the same size. You want them to be nice and uniform so that when you are stacking you have nice lines. Mine were not perfect. You will see my lines are not precise. (This was my first time making this type of cane so this is a trial and error) A don't make it the exact way I did tutorial. So please follow my Notes along with the photos :). Yours will come out way more uniform than mine. I have lots of Tips for you coming up to make yours perfect and you will have a Plaid cane with perfect straight lines and I cant wait to see your results.
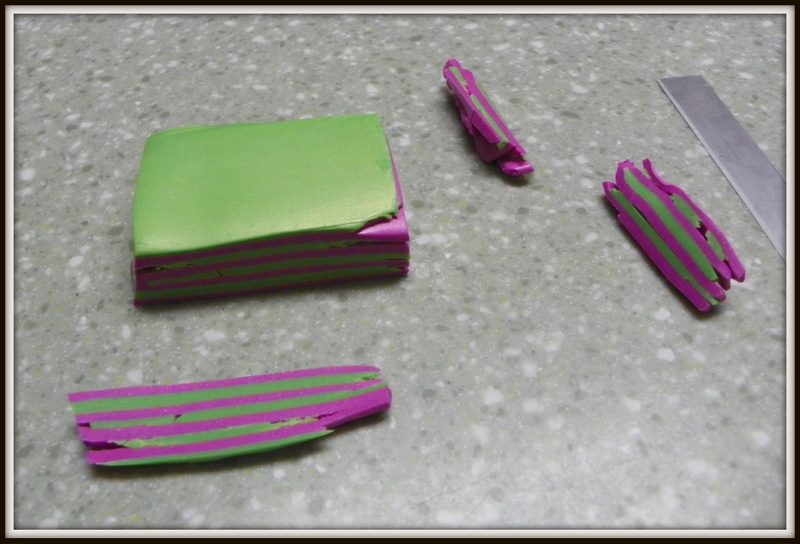
Step 7 - Photos 7-10 : Stacking your Colors, One Green, One Pink, Stack all 8 on top of each other in the alternating order because this step we are creating the Striped part of the cane.


Step 8 ~ Photos 11- 16 : Just above is a photo of your stacked clay. As you see rough around the edges. It will be a tad at this point. Step 8 is to clean up those edges. So with your blade slice only what you have to on each side of the rectangle to make the sides straight and clean. Do not over cut. Just enough to make it look less jagged and more uniform.


Step 9 ~ Photos 17-18 : Once you have cut your edges. Take the Acrylic Roller or Brayer Roller and lightly roll the Green side then the Magenta side. You don't want to roll super hard, Just apply a light amount of pressure to get any air bubbles out that may lurking in there. When you cut the edges off you can see an air bubble sometimes in the clay. (a hole) So you want to make sure your press that area down so that all your layers are sticking together nicely.


See the little air pockets in there? Roll with the roller until they are gone. Don't smoosh the clay too hard. If you make your cane too flat you will not have a good base to work with. Always try to keep your nice rectangle shape. Even if it means rolling on the side of the rectangle to make the cane thicker while you get the air pockets out.

Time to create the puzzle. This was a puzzle seriously. So please follow the photos and directions on this part closely.
Step 10 : Cut your Rectangle in half at an angle like shown in the photo. Does not have to be an exact degree. Just an angle.

Step 11 ~ Photo 20-21: Place the Left Piece on top of the Right piece


Step 12: Lay the Cane on the side so you see stripes up As shown

Step 13: Turn the stripes on an angle. We will be creating an angle puzzle and you need to have the base on an angle so you can see your lines and place all the clay pieces in the correct spots.

Step 14: Using your blade now we want to create a square. Slice the left section off of the cane to make the left side square.

Step 15 ~ Photo 24-25: Once you have cut the piece off, Move the piece you cut to the bottom Right side of the cane as shown. Do not turn the cane, You want to move it just like my photo says so that you keep the lines and colors lined up on the right angle.


Step 16: As you see the square puzzle is starting to form. Now cut the bottom part of the cane to make the bottom of the cane square. As shown in the photo below. Do not move the cut piece. Just cut and wait until the next step.

Step 17 ~ Photos 27 - 30 : Move the Piece that you cut from the bottom right. Your going to want to turn it on the angle to where your lines meet up. Follow the photo directions. You may need to move the little diamond shape you have around until you have it square and the lines and more importantly the colors match up. As seen below in the photos.


Now you have your Square at the right angle and together. It is not going to look perfect. The lines will seem off track a bit. but once we cut it in the next step and reduce it a little it will line up perfectly.
Step 18 ~ Photos 31-33 : Cut your cane so you have a perfect square. As shown in the photos below. You want to make a cut across the top to make the top square and straight. Be sure to hold your blade very straight up and down to make a nice slice down the side not an angled slice. Keeping it very square. This is a Square cane.

Cut the Right side of the cane


Now we have our Square.

My TIP is. Put your cane in the fridge for an hour and take a short break. I used the pearl clays and they are softer clays. So depending on what you use your clay may be soft and when reducing you want your clay to start out somewhat firm. I did not let mine get cold. I wish I would have. So this is a tip that I would not skip. Plus Every clay artist needs a break.
Welcome back ! Ready to Reduce????
Step 19 ~ Photos 35-39 : This is not the normal way of reducing. We are sort of reducing. I guess we could call this stretching it a little. In each photo. You will see a different side of the cane. 4 sides, 4 photos. In each photo. LIGHTLY but firmly roll the side with the brayer roller or acrylic roller so that you get air bubbles out and you put those stripes together that we formed by cutting and shaping in a puzzle form. The Square will again become more of a rectangle.


Step 20 ~ Photo 40- 43 : now lay your Rectangle flat. Were going to cut it in half.


Lay both rectangles flat facing the stripes opposite ways as shown in the photo.

Step 21 ~ Photo 44 :Making your Solid Colored Squares. This is a basic step of making a Rectangle the same size and shape in Green and magenta as you your two rectangles you have that are stripped. So Shape and cut accordingly. Until you have two rectangles that match the size, length and width as the striped canes. You will then have 4 rectangles.

Step 22: Put the Green and one of the striped Canes together

Step 23: Put the Magenta and the other stripped Cane together.

MY TIP: As you can see the green pearl and magenta pearl are softer than the stripes. My TIP. Put all four together to make a large square. Then put them in the fridge for an hour. With this clay it was soft, I should have put it in overnight. Another tip: do not work in a room without air conditioning. All clay types vary. If your clay is not overly soft move on to the next step. I would at least let it chill for awhile. Because you really want to keep the uniform shape of the stripes. So take an hour break let this chill and come back for more.

Step 24 ~ Photo 47 - 52 : These steps are a slight reduction process of the cane. More or less making sure all the rectangles are fit together snugly. I turned the cane on each side and lightly pressed with the heal or the side of my hand and pushed straight down to push the sections together. At this point a Square Rod would have worked better. I had it sitting there and for some reason used my hands. A rod would be more of a uniform pressure. Push straight down with the rod. If you don't have a rod. A acrylic tile will work too. something flat. You are not going to be reducing much. you don't want to flatten the cane alot. Just enough to push all 4 of the rectangles together nicely. No bubbles in between.


Step 25 ~ Photo 53-54 : Using the acrylic roller. Lightly roll the whole top of the cane. Not alot. Just lightly to smooth it out nice and flat to prepare it for the next step of adding stripes to the checkered cane.


My Tip: As you can see my clay is still soft. Because I didn't put it in the refrigerator at all. Yours will look much nicer than mine. It will have a more square shape and more uniform stripes.
Step 26 : Roll out a 8 inch by 3 inch piece of white glitter clay.

Step 27 ~ Photo 57-60 I like to measure exact. I love these little rulers with the blue flag on them. ( Walmart in the sewing section) You can move the blue flag so you don't forget the measurement. Genius. lol. Works well with all clay or jewelry projects. I have them everywhere. Sorry Got off track. Back to measuring . Measure your Height and width across the top of the cane. Then go and cut two rectangles out of the white clay with your measurements.


Step 28 ~ Photo 61 - 68 : Now to add the white Stripes. You can add them wherever you want on the rectangle. you can also add more than 2. I just chose two because I was going to reduce it very small for my project. If your not planning on doing several reductions. Then I would add more white stripes. so you have more Accents.
See below I cut each section, Added the white rectangle then re-attached the sections.


Now to create More Stripes
Step 28 ~ Photo 69 - 79: This is basically the exact step as 27, Just the opposite way.


Step 30 : Lightly Roll the top with the Acrylic roller to make sure all sections stick together nicely so you have not air bubbles.

My Tip: I know your going to want to choke me but for best results. Refrigerate for an hour. this is a large cane and odd shaped because its is a rectangle. We need to reduce it to a square. I wish I would have let mine sit overnight in the refrigerator. I did not let it cool at all and my lines were not good. Shame on me and Learned a New Tip That I will follow from now on. Refrigerate between reductions . I have over 100 tutorials. No exaggeration. Not one of them says to do that, But did you ever notice how perfect the cane maker and tutorial makers canes are? No distortion at all? There is a few steps missing in those tutorials somewhere. I bet one is let your clay rest and cool.
My Tip: At this point decide also. Are you going to want to reduce this cane 2 - 3 more times. If not add more white stripes for more pattern. Just an option. If I had it to do all over again. I would have done this at this point. The cane would have shown more detail if I would have left the cane larger with more accents. So If you want more stripes in white, repeat steps 27-30.
Step 31 : Reduce your Cane. I used the same method as I did in Step 24 until It became a square like in Photo 80


Keep reducing. Being careful to keep your lines straight. Following the white lines is a good guide on all sides to keep it in shape. Do not twist or roll the cane when reducing. The press and stretch method is the best. A Square Rod is great to use to reduce this cane.

At this point my cane is a little longer than 8 inches. I should have stopped there but I thought I wanted a smaller detail. It looked really nice at this point but I kept on going. I wanted more checks. Not realizing when you use a checkered cane you can slice it and add more checks next to each other without having to reduce the first one. Big Duh on my part. I know better. Next time I will Reduce once.
Optional: If you want to make the cane smaller like I did. Cut in four sections and reduce again. Like shown


Finished Cane. Again Yours will look so much better because you Refrigerated RIGHT? My lines would have been straight If I had not reduced x 3 and would have let the warm clay get harder for reduction. But the outcome for my project was lovely.
This was the outcome of my Plaid Cane. I created checkered clay roses and Ribbons on a bib pattern necklace. I didn't win the monthly challenge but I sure did learn alot and most important I enjoyed myself. I hope you did too. Hugs to you and Keep on Claying.


For more Tips, Tutorials & Technique's Watch this weeks blogs. I will be publishing several free tutorials. Have fun and if you have any questions please email me.

To find my finished work and where I sell Please click on these links
My Artfire:

My Facebook:

My Etsy:

2 comments:
Lovely tutorial. The piece is just beautiful!!!
A great job on this tutorial, Kim. You are so right to stress the "resting and cooling" aspect. It makes a BIG difference when caning; after so much work, we want to end up with a cane we are proud of, and the maximum usable length, too.
If anyone is looking online for one of those neat rulers you showed, it is called a "sliding hem gauge".
Post a Comment