
I sure have missed blogging. I have been traveling with polymer and Lucy Clay Tools. Having a great time but my health has been poor and I have been helping with my mother in law that is suffering from Alzheimer's. I sadly do not have a lot of time for anything. I hope things slow down and I have more time to share a lot of amazing photos and fun from the events and the tools that I have fallen in love with.
Lucy Clay Tools Presents the new 3 Piece Wavy Blade

Lucy Clay Tools Presents the new 3 Piece Wavy Blade
Make fun and easy waves in polymer by just slicing into it. How? The new Lucy Clay Wavy Blade set. Sometimes it's all in the way you slice it.
For example just using the Lucy Clay New Wavy blade and a jelly roll creates fun magic Beads.
For example just using the Lucy Clay New Wavy blade and a jelly roll creates fun magic Beads.

Lucy Clay Blade set available in my shop

For this Tutorial I used the rounded waves. I used the triangle cut for several projects at IPCA. More to come soon.

Tools and Supplies needed
Pasta Machine
Tile for cutting and baking
Lucy Clay Wavy Blade
Optional: Small acrylic rods
Piercing tool to make beads
Texture for polymer square bead ends
Clay:
Premo Black
Premo Blue Pearl
Premo Purple Pearl
Premo Candy Pink
Sculpey III Ballerina
Step 1:
Photos not shown. There are a lot of amazing Jelly roll tutorials on line. I love the ones on http://www.craftartedu.com
Make a multi colored or two colored jelly Roll.
How I made mine..
Create a skinner blend of the colors below
Premo Blue Pearl
Premo Candy Pink
Premo Purple Pearl
Sculpey III Ballerina
Back the full skinner blend in
Premo Black
Run the two blends through the pasta machine one more time on a 3 on an Atlas, Then on a 5 then roll the full with Black on the outside of the Jelly Roll.
I put my lightest color on the outside when rolling.
Cut the rolls into sizes you would like for beads.

Slice the front side of the roll with your wavy Lc Blade

Photo above of the first cut. I was just experimenting and this ended up being so pretty. I love Premo pearlized colors they truly give you a fantastic jelly roll.

Turn the roll and cut the next side.
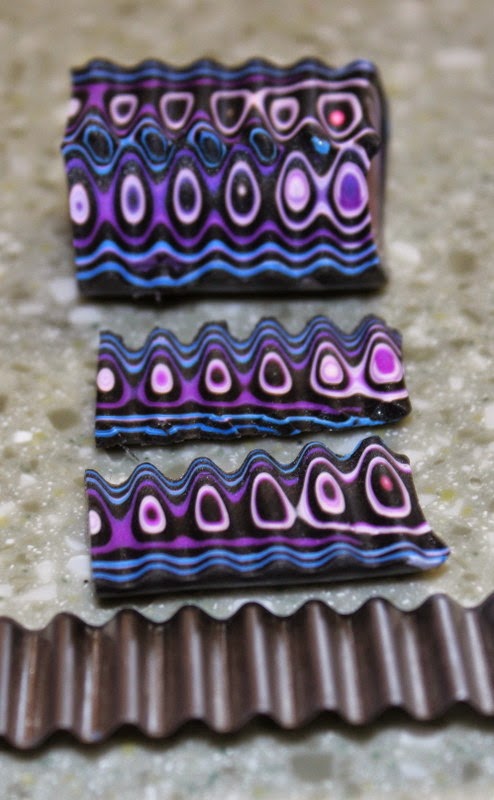
Photo above of both cuts.

Turn the roll again and cut another side.

Photo above of the slicing in process.


All three cuts made. Keep the fun extras for projects later.

Making the last cut. Look at the amazing wavy fun.


You now have a fun rectangle square bead. Slice away any parts you want to change. Or round the edges. I left it wavy so you can see and feel all the grooves. You can choose the wavy or you can roll with a small acrylic roller and make the beads smooth.
Cut up a few more fun wavy jelly roll beads. Add some black clay square ends and texture them and or leave the jelly roll to show.. I love the look of both ways.

I kept the extras and I will make a fun pendant like Lucy did on her design..
To See Lucy's fun tutorial's using the blades.


I have another blog coming soon. A fun tutorial for disk #6 that is available by pre order on my Artfire shop.

Thank you for stopping by and for your support. Be sure to follow my blog as soon there will be a lot of tutorials, giveaways and some exciting new tool reviews. See them first here.


Thank you to Polyform for your amazing support in all I do
Create with Love, Color and Bling
No comments:
Post a Comment