I love Polymer Clay. I love to create with it, I love adding many other mediums to it. Lamp work glass, wire, swarovski crystals. You name it if I can add it to clay or If I can put clay on it. I cover it with clay. I love to experiment that is how you learn. Never be afraid to try to put clay on something. It will work with almost anything.
My Favorite Clay, Tools, and Other for my Clay Creations & Jewelry.
~ My Favorite Clay & Why. Premo is my favorite always. For several reasons. It is very easy to condition. Blends well with other colors to make your own colors of clay. Comes in tons of amazing colors. Easy to sculpt and when your blending with tools while sculpting it will smooth easily almost like paint. I love it. With other clays they crack or when you try to blend when sculpting they destroy what is under it. I have noticed when making clay canes (not something I really like to do yet). When I do use premo in canes I will form the cane then let it get cold in the refrigerator for an hour or so or overnight if a large cane so that it does not distort.
~ My favorite Clay for sculpting figures, faces is Sculpey Living Doll
~ My favorite liquid clay is Kato. I use liquid kato clay for alot of things. It is part of my Resin recipe that I use on everything.
I do like sculpey liquid clay for bonding. If you need to add clay to clay to re bake and you don't have sculpey bake and bond then the liquid sculpey does the trick. Sculpey liquid clay or Kato clear liquid clay work great for glass clay creating. I like to put a think layer on the glass before applying the clay, If I'm covering a large area. If I'm only covering a small spot I prefer glue.
~ Sculpey Bake and Bond. Works great for adding baked clay to new clay. I use it alot when creating with wood. I put a thin layer on the wood then add the clay. Scupley Clay Softener I use on occasion but never with Premo or Sculpey Clay ~ I have had to use it sparingly with Fimo & Kato. I love Sculpey Clay softener mixed with Liquid translucent clay for a thin resin on my creations. It makes them extra durable and gives them a nice shine if you use a heat gun after baking.
~ Favorite Glue.. Crafters Pick " The Ultimate ". I have tried everything. Have had so many things come un glued after my trial wearing periods. I'm odd I like to create something and I will wear the first one for a few months to make sure it lasts before creating something to sell. I would feel terrible if something did not last for a customer. There is always a chance with anything handcrafted or made in a factory that it may come apart. I just know I feel better testing my creations. Right now I'm fixing a customers $$$$$ string of real pearls purchased from a very expensive jewelry chain because they didn't glue and tie properly. It happens. If it does happen to something of mine. Please let me know. Ill fix it no questions asked. I want my customers happy.
~ Clay tools, I have so many favorites. The ones that never leave my table are : Click on the tool It will take you to the link to purchase them or see more items available by the Artists or Company.
 |
| Penni Jo's - Clay Tool |
 |
| Cf Originals Tools |
The Bottom Three I purchased At Joann's. I have had them since Day one and They are always in my tool cubby on my clay Desk
From left to Right : Sculpey 5 -in- 1 Tool ( I like it because they are magnetic and have a base. I use this when I travel with clay projects).
Center : Sculpey Acrylic roller. I use this every clay project. From Conditioning to finished product.
Right: Sculpey clay tools set ( It says for pottery too but I love the shapes and tolls in it, I use them for so many things. From shaping mouths on kid face beads, sculpting, smoothing and texturizing.)
I have pretty much every tool that Sculpey or Premo has out: Here is a link to their website to view all of their products.
A few other favorites are tools I purchased from :
Polymer Clay Express Link


Dona Kato Matrix Tool and Acrylic Square Rods , Both found at Polymer Clay Express
My one time favorite tiny but so useful tool : Pro Kemper Tool and I cant live without it. I have them all over my studio
Also found at Polymerclayexpress
and
Hold a ball of clay in your hand and squish it around, believe me you will be Inspired. Something about it brings you back to childhood with playdoh and silly putty. Anything you could do with playdoh and transfer like silly putty you can do that with clay. It is the most versatile medium there is out there. Shape it, love it, mold it, Slice it then bake it and you have your One of a Kind Design.
Just a few tips That I had been thinking of today while I'm on Bed Rest. Wishing I could be in the studio Creating with my clay. I still will discover a way to bring it in my bed. Lol I have a sketch of a table that I'm going to put on my honey do list.
Some Do's & Dont's That I learned from Experience
Feel free to comment if you have more to share
A few things NOT to bake with clay or add clay to and bake.
* acrylic IE: fake gemstones, acrylic beads, Lucite beads
~ one exception I have found is acrylic or plastic barrette bases. They are formed bases that you cover with clay. I have found if you put a thick enough amount of clay over them they do not melt. I never back them over 250 degrees and never longer than 50 minutes. If you do you will see the clay crack and see the plastic melt through the crack. This I learned on my first barrette. Thankfully it was a first time creation for me and not a customer.
* plastic : you do not want to melt anything in your oven or destroy your clay project you worked so hard on.
* Styrofoam : ugh please no. Don't try it. Fire hazard.
My Tip ~ with items that are NOT bake able. If you want to add something to acrylic glue it on with your choice of glue. If it is a stone you want added put the stone in to make the impression then remove the stone to bake it. Clay holds its shape well, it may shrink a little but not much.
and
Fun things you can put Clay on that I have experimented with:
* Glass : glass bowls, cups, plates, windows, beads, cookie jars, trinket boxes, candle holders, Cabochons (
Link to my Free Tutorial ) , I have even added it to eye glasses. Ornaments are really fun just make sure they are glass ones.
~ only bake safe parts of items. If your project is part glass part plastic, remove the parts that are not bake able and once baked put them back together again. You would be surprised how many things you can create that way.
~ My TIP Do NOT put the finished product in cold water when you take it out of the oven) You will have a beautiful crackle effect and then in a few short moments it will crumble. Not fun. When working with glass my advice is turn off the toaster oven, open the door and let it cool on its own. That is the best result. I have been in a hurry and put it in front of a fan on low to help cool faster so I could sand and glaze.
Wood. Wood boxes, Shelves, Frames, Jewelry Boxes, Clocks. You name it you can add clay to it. (don't forget to put either liquid clay or bake and bond on the wood so that you don't get bubbles and you get a good hold. and I like to roll my clay onto the wood with my acrylic roller if possible. Creates a great bond the first time) Brayer rollers work great for this too.
~My Tip : I like to use sculpey Bake and bond if adding clay to wood. I squirt some on the wood and smooth it out with my finger. Remove any access with a Windex wipe or alcohol wipe.
* Mirrors . I love creating with mirrors. I like to create around them and also on them. I love to sculpt full size flowers and add them to the top of mirrors for decorations. I'm in the process of making several to use for my backgrounds and props for my finished work and photography. I will blog about them soon. I'm making a tutorial for one and want to share all at once.
* Most Metals are safe to bake with, IE: bead caps, charms, ring bases, bracelet bases. If your not sure ask someone. Ask me. I'm always awake to help. ;) I rarely sleep. My body and brain do not let me.
~ My TIP : When you want something to stick to metal and do not want to have to glue it after because you may break a part off. I take a sharp end of one of my carving tools and scratch the surface of the ring base, pendant base, whatever it is. Scratch it about 15 spots in different directions so that the glue you add has something to adhere to. Then use your glue of choice to glue then bake. I have jewelry that I did this to for over a year and its still holding well.
* I love using Clay on scrap booking. You can create so many fun things for your scrapbook pages that you cant find in a store. Custom Designs with names or photo image transfers. Claying with Scrap booking is a fun hobby.
* Claying on Gift cards. Personalize your own gift card. Pretty much the same principles as scrap booking but think of the possibility's. Funny, Your words not someone elses. You can add photos from photo transfers from birth on up till 100.
* Metal Business card holders, Business Card Stands, Purse Mirrors, Purse holders. Pens, Pencils.
* Jewelry of every shape and size. No piece is to big or small. With clay use your imagination. It is so beautiful when done. Its wearable art so don't be afraid to create bold and beautiful statement pieces. They are not for everyone. There are so many out there that love a piece of wearable art. Its also a great conversation piece if you wear it. You can be your own walking advertisement. I do that all the time. I wear my cloths around my jewelry selection. Its fun. If I don't have something to match. I create it. How fun is that. You have your own built in jewelry store :). Don't be afraid to create what you love. First instincts and ideas are usually the best ones.
* I love creating Aeco's out of clay. Sometimes mine are a little larger than the collector card size but they are so beautiful on display that I never want to sell them. I have two in progress right now. I keep thinking there finished then I get another idea to add to them. That is the great thing about clay. You can walk away and save it for a rainy day. I usually like to cover mine or put it in the refrigerator to protect it. Or cover it with plastic wrap. Just not to tight.
Soldering ~ Yuck
No time to Solder? Or Have a Clay Creation You cant Solder and Want to?
My Tip: Adhering Metal to Metal without soldering. Its hard sometimes to solder something that you have created with clay. Well almost impossible if you have already created the object. I just recently and why I never thought of it before I really don't know. I now glue the two pieces of metal together and then take small bits of clay and cover the glued area that is allowed to be covered and bake. Works wonderful. I have tried to pry those puppy's off and they wont come off. Love it. I sure wish I would have thought of this with all the hundreds of barrettes and pin pendants I created and sold. Ahhh But we all have to learn. So if you have a pin that I made and it needs to be glued again. Email me. Ill fix it right up for you. :) Or have something you need to stick together that isn't clay and you don't want it soldered. I know some people don't like it because soldering can cause discoloration of the metals. I will say at times the discoloration is beautiful and can make a very unique piece. But if your not looking for that effect you may want to try clay. It works as a great bonding agent and with all the amazing colors there are you can blend it easily onto anything. Also with
Swellegant from CForiginals you can pretty do anything your little heart desires.


WHITE
Working with white. Ah the dreaded white. Recently I started a project All white. Lots and lots of it. Oh and don't forget transparent clay. What wonderful things these two colors can pick up. Ugh. Well Here is my method. Its working amazing. I have been working on my project on and off for a few weeks and not a dot of lint or anything on any part of it. :) YET. Fingers and toes crossed.
1 : wash everything with Windex wipes. Your clay area, your tiles you bake on. All of your tools whether your going to use them or not. Because if you pick one up you forgot. You have color you don't want.
2: Keep Rubbing Alcohol handy either in a bottle on wipes or Q-tips. It works great for taking a color off or a spot you have on clay.
3: wear gloves. Every time you touch something that isn't your project change your gloves.
4: When switching from transparent to white change your gloves or wash your hands with wipes.
5: If your using transparent clay colors. Always wash your hands and or clay tile your working on so that you do not get this color on projects you want to stay white.
6: if your adding alcohol inks to your white clay for a touch of color. Keep regular rubbing alcohol handy in case you put on too much you can lighten the color or remove it quickly if you put too much with Rubbing alcohol. Move Fast.
7: Most of all take your time. Don't rush. Rushing creates boo boo's and with white clay its hard to fix them.
8: getting rid of a hair or a fuzz that came out of no where use a sharp tissue blade (CLEAN ONE) and slice that area off. If you need to add more clay to fix that area do that after you have cleaned the area and removed the colored clay boo boo.
9: Before baking take out a magnifying glass and look at every angle. There is nothing worse than baking and finding something you cant get out after. Some slight things you can sand off with wet sanding but most of the time its deep in there. So take your time check everything and your white creations will be beautiful.
10: Tip of making ghost canes or very light colored clay canes. With each step put a piece of wax paper out and lay your clay on it. Then do the next step for your cane.
11: In between steps: take a plastic container and put it over the top of my cane or creation until your ready to use that part again so nothing from the air gets on it.
12: Most favorite. tip. I do this with all projects not just white. I keep a ball of white clay on my clay table all the time. I roll it all around on my hand and squish and massage it to get any fuzz or color off my fingers or palm. It picks up everything, you would be surprised just after cleaning what may still be on there.. Hence why working with white stinks. I love this and it works great. I do this with color too when I change from one color to another. I clean my whole hand massage that small piece of clay for a few minutes and it really cleans up your hands. I keep a second larger piece around when working with white. ill roll it around the work area really quick every so often to pick up dust particles that you don't see. Works great. If you find this helpful let me know :) .
I know it sounds like a pain and it is a pain. But when you create with white its lovely and your work truly shows. So have fun with it at a slow pace and it will turn out just as amazing as you are.
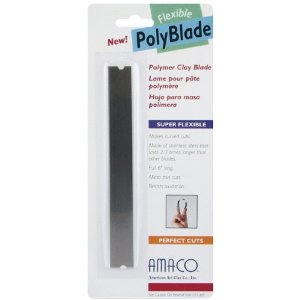
I almost forgot my right hand when claying ~ my blade. I am very picky about my blades. I have tried all kinds. Even had them shipped from Israel and other countries from artists saying they are the best. My all time favorite is:
Amaco PolyBlade that is Flexible. It cuts the thinnest cane slices. You can cut on angels, curves anyway you need to. I love it. I have them everywhere and I always loose them. Sadly I can never find them locally so my bestest friend Valerie Cook in Florida goes to Hobby Lobby and Michaels and mails them to me. We need a real fully equipped clay craft store in this town.
I know there are a million other things I will think of once I publish this.
Ill Just update as I go along. If you have a tip you want me to share.
Leave a comment and Ill try it and then share :).
My Free Tutorials ~ Click the Photo ~ They are Linked to the Blog Tutorial
My Plaid Cane ~ Free Tutorial
My Golden Cabochon ~ Free Tutorial
My Rose Hair Stick ~ Free Tutorial
Surprise Coming Soon ~ Guess What it is???? Yes part is a Petal Cane,
But what Do I Teach You for Free?
Keep Checking back ~ This one is a Beauty.
I made this one back in April. Excited to share.
Thank you for Stopping by, this blog page will be updated as I find new Tips to share
I have many in my head rumbling around but I have lost them
in there somewhere. I will find them and share soon.
Thank you for Supporting Me & Handcrafted Artisans
To Buy of View My Work Click on the Links Below
Create with Heart, Love, Color & Bling
Hugs & Blessings
Please comment and share, any tips welcome.
This is how we can all learn, together and from each other.