

I WON !!! Found out 9/4/2012 That I Won the Challenge
My Bullseye Cha Cha Bracelet is the Winner of
Polyform Products Make It Your Own ~ August 2012
Im so Honored & Excited, Thank You Polyform Products.

Polyform Products
Congratulations to Kimberly Idalski,
the winner of the August Make-It-Your-Own Contest.
Kimberly created amazing jewelry using extruded canes.
Kimberly please contact Iris at iweiss@polyformproducts
with your address so that we can send you your prize."
To link to the Facebook page click the photo below.


To View The Challenge Rules Click the PolyForm Button

August PolyForm Products Make~It~Your~Own Contest
Inspiration Photo & Tutorial ~ Hooty The Owl ~ Extruder Bullseye Cane
Click on the Owl Necklace to take you to the Fun Free Tutorial

This was Such a fun challenge. I really enjoyed Working with The Extruder Again
It had been awhile since I made a cane with it. I forgot how neat they turn out.
I like it because every slice is different.

My Tools & Clay I used for my project
Premo Clay
Sculpey Liquid Clay
Sculpey Bake and Bond
Mini Circle Premo Cutter
Mankins Extruder
Square Extruder Blace
Clay Blade
Acrylic Roller
Kemper Dot Tools
Cforiginals Tools
Penni Jo's Tools
View a tutorial with more at the end.
My First Entry for The Challenge
"Bullseye the Lizard"

Bullseye was truly a fun project. He was bullseyed everywhere.
Even the end of each little toe had a slice of bullseye cane on them.
I started out with using all of the scrap cane for his body and he just came together so cute.
Of course I had to add a huge Genuine Swarovski Bling in there and White Tiger Eye Eyes.
Hope you love Bullseye as much as I do. My son Claimed Him. He will have a good Home.


While Bullseye The lizard was in the oven catching some rays.
I had more fun playing with the bullseye cane.
I had been making so many Cha Cha bracelets lately I knew this would make an awesome one.
So I sliced up some magic Bullseye Cane and created
My Second Entry for Polyform August Make~It~Your~Own
Bullseye Cha Cha Bracelet

I created 4 Bullseye Flowers, 6 Bullseye Round Beads
Added 60 Pearls in Red and Black
Some Pretty silver Links and Toggle Lobster Clasp
And I loved it, Had to share so I entered it for the second entry.


A short Free Tutorial, Tips & Techniques


My Tools & Clay I used for my project
Premo Clay
Sculpey Liquid Clay
Sculpey Bake and Bond
Mini Circle Premo Cutter
Mankins Extruder
Square Extruder Blace
Clay Blade
Acrylic Roller
Kemper Dot Tools
Cforiginals Tools
Penni Jo's Tools
View a tutorial with more at the end.

Left to Right:
Premo Black 5042
Fimo 803 Granite Effect
Premo Navy Blue 5010
Premo 5026 Pomegranate
Premo 5219 Silver Accents
Premo 5101 Pearl Accents
Premo 5057 Frost White Glitter
I added the Granite in when I decided on the creature.

Rolled out Conditioned Sheets of Clay in each color left on the thickest setting
Then used the Mini Premo Circle cutter to cut many many circles

Doubled each one up and Stacked them together.
I made Two of these Below With this many Circles
Make sure your slices are stuck together nicely by reducing slightly

Choose Your Blade for your extruder. I used the Mankins Square Blade
Put the whole cane that fit perfectly inside the extruder.

It came out like this. Fun squares in many colors. A new color combo in every slice

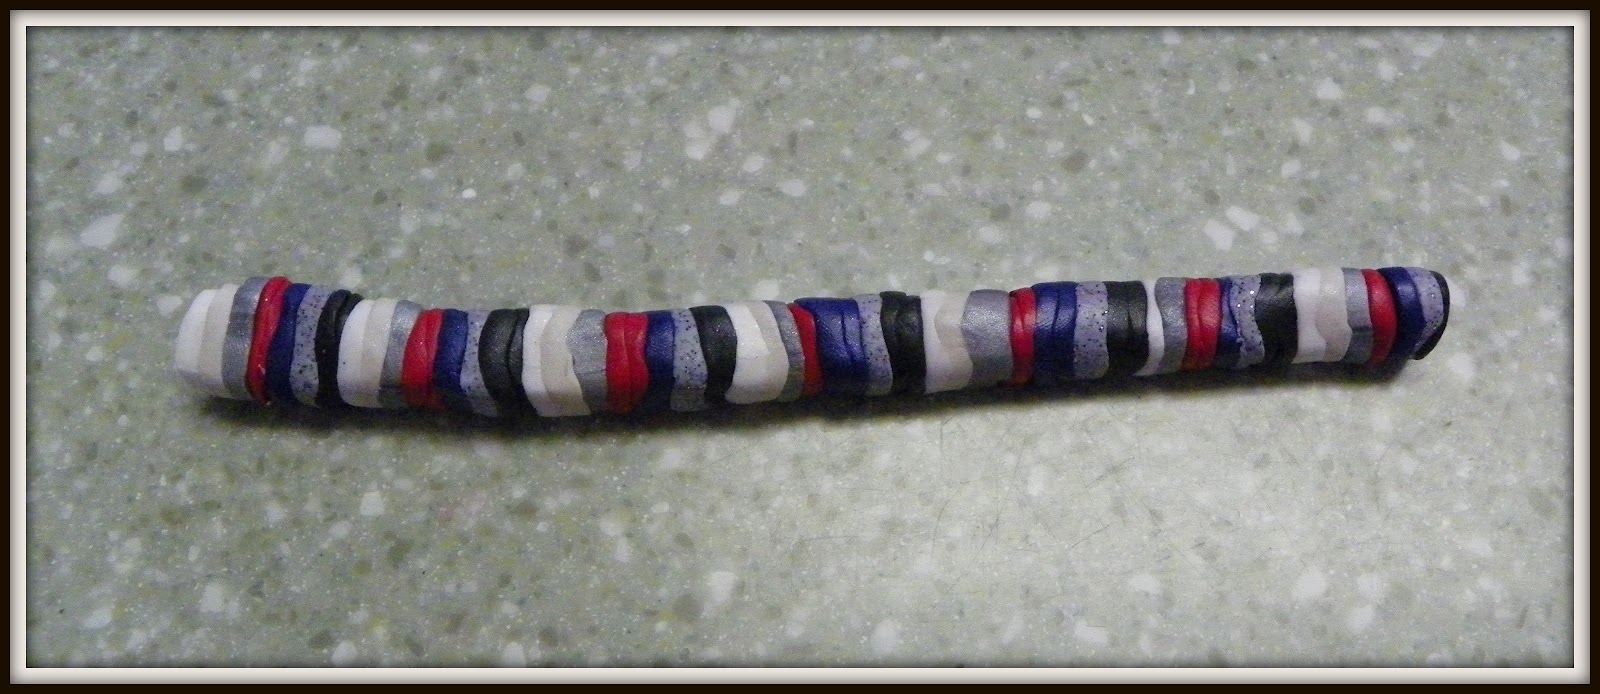
Very long snakes of bullseye canes. I made two of these.
Only needed 3/4 of one for my Lizard.

For a small project I would recommend only using 1/4 of each block of clay
and 1/4 as many circles that I cut
Unless you want to use the bullseye cane forever :).

Extruder Tips:
1: Before use Make sure its clean. I put a Baby Bottle Brush with a baby wipe on it and clean the inside out even if you put it away clean everything collects dust.
2: I always put a small about of baking soda baking powder in the extruder then swirl it around and empty it out before using (makes for easier cleanup)
3: To clean the Extruder : Take a ball of Scrap transparent clay an roll it into a log
Leave it big enough so it gets every part of the extruder, Push the transparent clay through the extruder. It takes alot of the hard to get clay out of certain areas you may not see.
4: Warm soapy water and a baby bottle brush. Scrub it (make sure you take the O ring out and set it aside) inside several times until you see only clear water come out of both ends.
5: I then take a bleach wipe or windex wipe and wipe it clean with that. Pull it in one and and out the other.
6: set in the dish dryer overnight then store in your storage area.
7: O ring and blades. I always wipe those clean with baby wipes and dry good. You don't want to leave them soaking in water or the metal will rust and the O ring will dry rot. So wipe clean and Store in a plastic air tight baggie. Ive had mine over a year and its like brand new because of proper care. Clay tools are expensive take care of them.
1: Do not use Lisa Palvek Resin on a large dimensional Item. It will never dry properly. Nor will it fit in the Uv Light good. You can however bake it in the oven but it does not give it the same nice effect the light does. I love the Resin. Just not on large creatures.
2: Since it is hard to buff a dimensional creature. Use Resin. Trial and error and you will find one you like, I find that way if you plan to use something that is three dimensional in your hair or as a ring it is much much stronger.
My Resin Mix & Baking tips:
I always but a resin coating on everything I make. I always recommend mixing 3 tablespoons Kato or Sculpey Liquid clear clay and one teaspoon sculpey clay softener in a cup. Mix well let sit till bubbles go away. Use that as your Resin. Bake at 250 for 20 minutes, Take out your creature. Paint on another thin layer and bake at 250 for another 20-40 minutes depending on the thickness of the project. That is my Resin secret. Creates a wonderful strong project. ( I like to bake my items for over an hour~ But unless you are using a oven thermometer and a clay only oven I would not recommend it unless your used to your oven and the clays your using). I have found over time the longer it bakes and cures the better.
3: I like to let my clay creations cool in the oven. Unless they are transparent clay. All transparent clay creations get a ice bath so that it makes the transparent super clear. Works nicely when you do that. Dry off and then I let it finish curing in front of a fan.
4: I follow up almost everything I make with Fimo glaze. It is my glaze of choice. If I do not glaze I use my dremmel and Renaissance.


Create With Heart, Love, Color & Bling
3 comments:
I've tried creating it from scratch with our garden vegetables, but
this looks much easier and quite tasty! (and I may not smell like garlic for a week after)
Love the gift basket idea!
christmas gifts
Love the lizard...lol!! Also love the jewelry piece you made. Thank you for sharing!!
Congrats, they both look great.
Post a Comment